HOME Information DrayTek Blog ACS Register a VigorSwitch to VigorACS
Register a VigorSwitch to VigorACS
To manage and monitor a VigorSwitch from the VigorACS server, you need to register it to the server first. The CPE (the switch at the customer's site that you would like to manage remotely) registration requires allowing TR-069 access and having the correct TR-069 parameters. STUN settings are necessary if the CPE is behind a NAT device(e.g. behind another router). Also, make sure no firewall rules block the traffic to the VigorACS server.
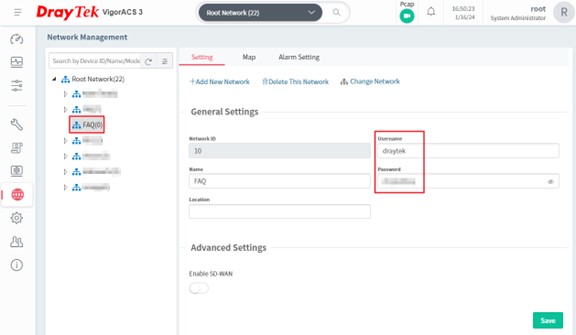
First of all, make sure the Network group setting on the VigorACS server is ready. Go to Network Management to create your network group (which you want the CPE to join) then specify the username and password of this network. Please keep the username and password of this network in mind.
The configuration of the VigorSwitch
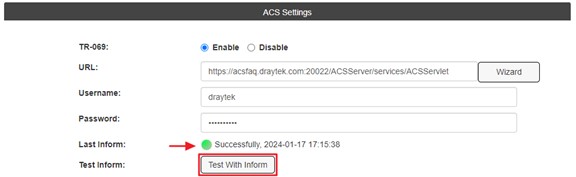
1. Go to System Maintenance >> TR-069 page and have the settings as follows.
• Enable the TR-069 service first.
• Click Wizard, then enter the IP address or domain name, and port number of the VigorACS 3 server, with the handler /ACSServer/services/ACSServlet. It is strongly recommended to use HTTPS protocol so that all the communication between CPE and VigorACS 3 will be encrypted.
• Enter the Username and Password of the network group on VigorACS 3 you would like the Switch to join.
• Select HTTPS as CPE client connection protocol.
• Enable Periodic Inform, so that the Switch will send its status to the server periodically.
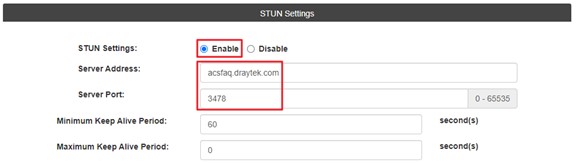
• If the VigorACS 3 is on the internet, enable STUN Settings and enter the Server Address and Port as the IP and port of the ACS server.
• Click OK to save the settings.
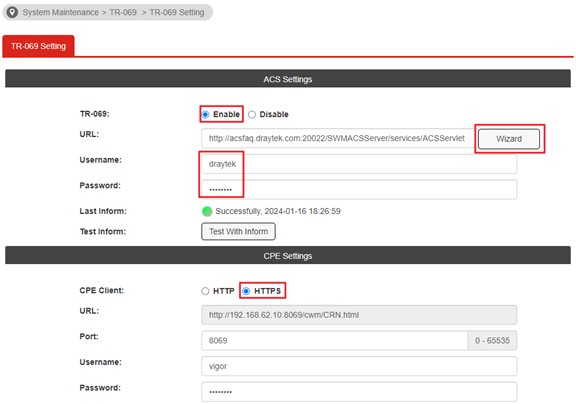
2. After saving the configuration, we may click Test With Inform to check the connectivity between the Switch and VigorACS server. A green light indicates the Switch has received a reply from the server, which means the communication between the Switch and the server has been established.
The configuration for Web Smart Switch G1282/P1282
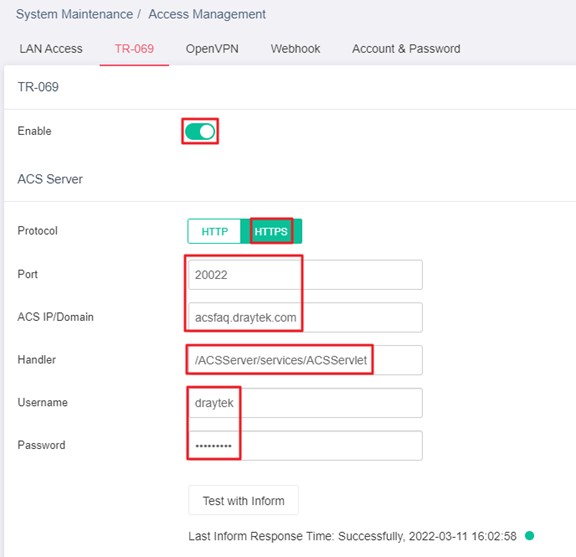
1. Go to System Maintenance / Access Management / TR-069 page and enable TR-069. Then click Show Advanced Mode and configure it as follows.
In ACS Server:
• Select HTTPS.
• Enter the port and IP address or domain name of VigorACS 3 server.
• Make sure the handler is /ACSServer/services/ACSServlet.
• Enter the Username and Password of the network group on VigorACS 3 you would like the Switch to join.
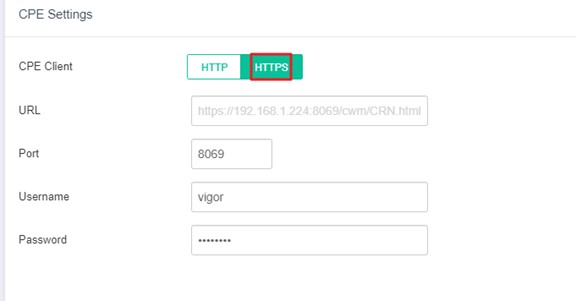
In CPE Settings:
• Select HTTPS for CPE Client.
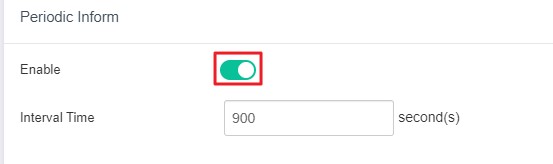
In Periodic Inform:
• Enable Periodic Inform.
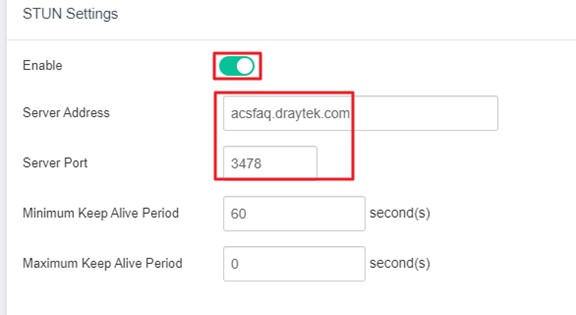
In STUN Settings:
• Enable STUN if the VigorACS 3 is on the Internet.
• Enter the Server Address and Port of the ACS server.
Remember to click OK to apply the settings.
2. After saving the configuration, we may click Test With Inform to check the connectivity between the Switch and VigorACS server. A green light indicates the Switch has received a reply from the server, which means the communication between the Switch and the server has been established.
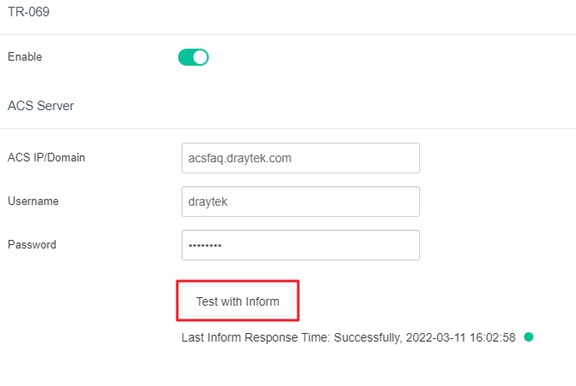
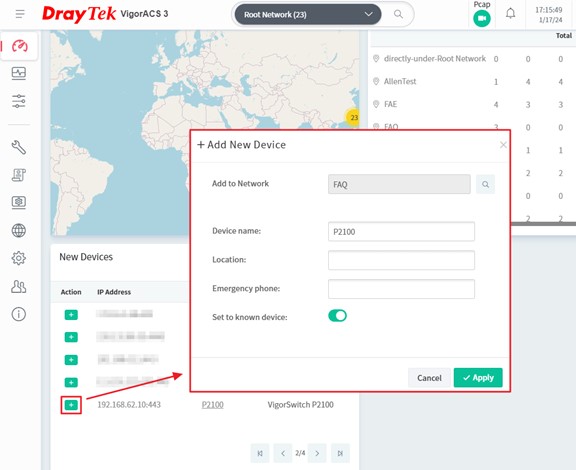
3. On the VigorACS 3 Dashboard, we should see the CPE appear on the New Device widget. Click "+" to confirm and add the device to the network.