HOME Information DrayTek Blog VPN IKEv2 VPN between DrayTek Routers
IKEv2 VPN between DrayTek Routers
Developed from IKEv1, IKEv2 is a new VPN protocol and has lots of improvements than the previous version. Compare to IKEv1, IKEv2 is more stable, it supports the latest cipher which makes the connection more secure, and takes a shorter time to establish, and by removing the point-to-point protocol, IKEv2 takes a shorter time to establish the connection.
This article demonstrates how to establish an IKEv2 VPN between two Vigor Routers.
DrayOS
VPN Server (Dial-In) Settings
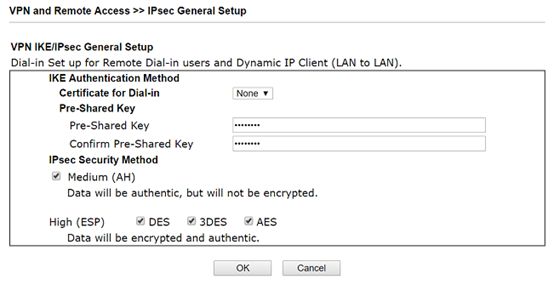
1. Go to VPN and Remote Access >> IPsec General Setup,
a. Input Pre-shared Key
b. Confirm Pre-Shared Key
c. Click OK
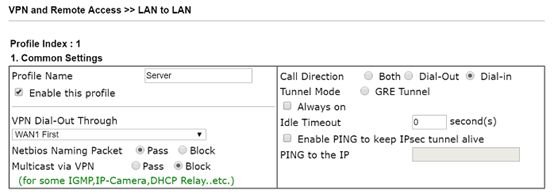
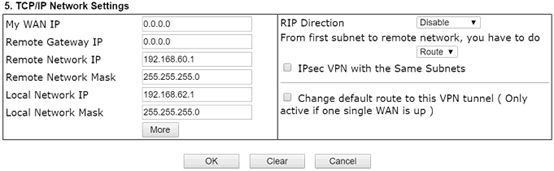
2. Go to VPN and Remote Access >> LAN to LAN and click an index available,
a. Check Enable this profile
b. Select Dial-In for Call Direction
c. Allow IPsec Tunnel in Dial-In Settings
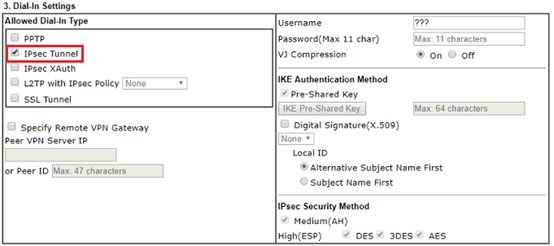
d. For Remote Network IP and Mask, input the IP subnet used by the VPN Client.
e. Click OK
VPN Client (Dial-Out) Settings
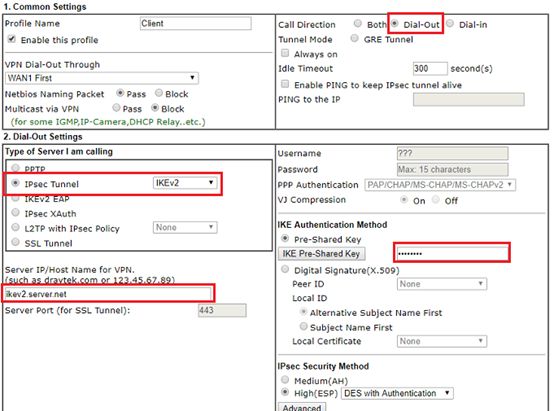
3. Similarly, create a profile at VPN and Remote Access >> LAN to LAN
a. Give a Profile Name
b. Check Enable this profile
c. Select Dial-Out for Call Direction
d. Select IPsec Tunnel and IKEv2 for Type of Server.
e. Input VPN server's WAN IP or domain name at Server IP/Host Name for VPN
f. Input Pre-Shard Key of VPN server
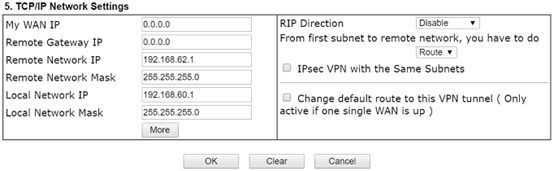
g. For Remote Network IP and Mask, input the IP subnet used by the VPN Server
h. Click OK
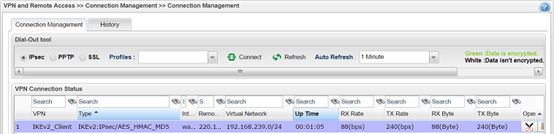
4. To initiate the VPN, go to VPN and Remote Access >> Connection Management, select the VPN profile, and click Dial
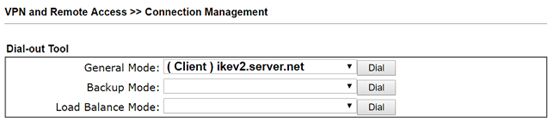
5. When VPN established successfully, the connection status will be shown.

Linux
VPN Server Settings
1. Go to VPN and Remote Access >> IPsec General Setup, type a Preshared Key then click Apply.
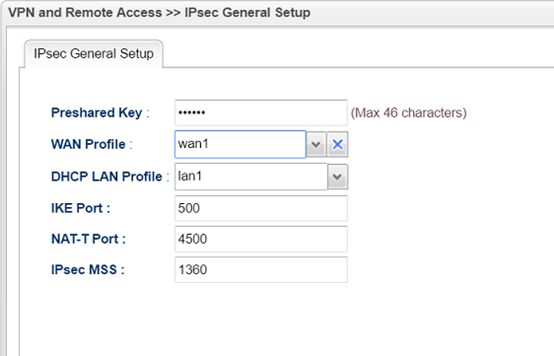
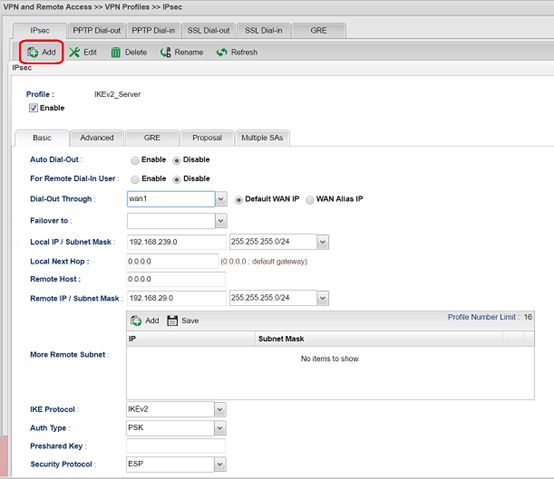
2. Go to VPN and Remote Access >> VPN Profiles and click Add,
a. Enter the IP subnet used by the VPN Server in Local IP/Subnet Mask
b. Enter the IP subnet used by the VPN Client in Remote IP/Subnet Mask
c. Select IKEv2 for IKE Protocol
d. Click Apply
VPN Client Settings
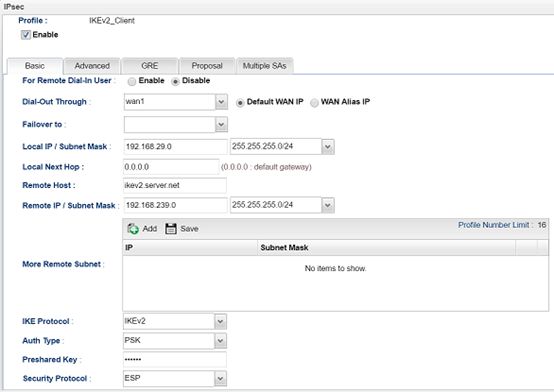
3. Go to VPN and Remote Access >> VPN Profiles and click Add,
a. Type the IP subnet used by the VPN Client in Local IP/Subnet Mask
b. Type WAN IP or Domain of the VPN Server in Remote Host
c. Type the IP subnet used by the VPN Server in Remote IP/Subnet Mask
d. Select IKEv2 for IKE Protocol
e. Type the Preshared Key set in step 1
f. Click Apply
4. To dial the VPN, go to VPN and Remote Access >> Connection Management, select the VPN profile, click Connect.

5. When VPN established successfully, the VPN status will be shown.